
Everything About - Sand Art
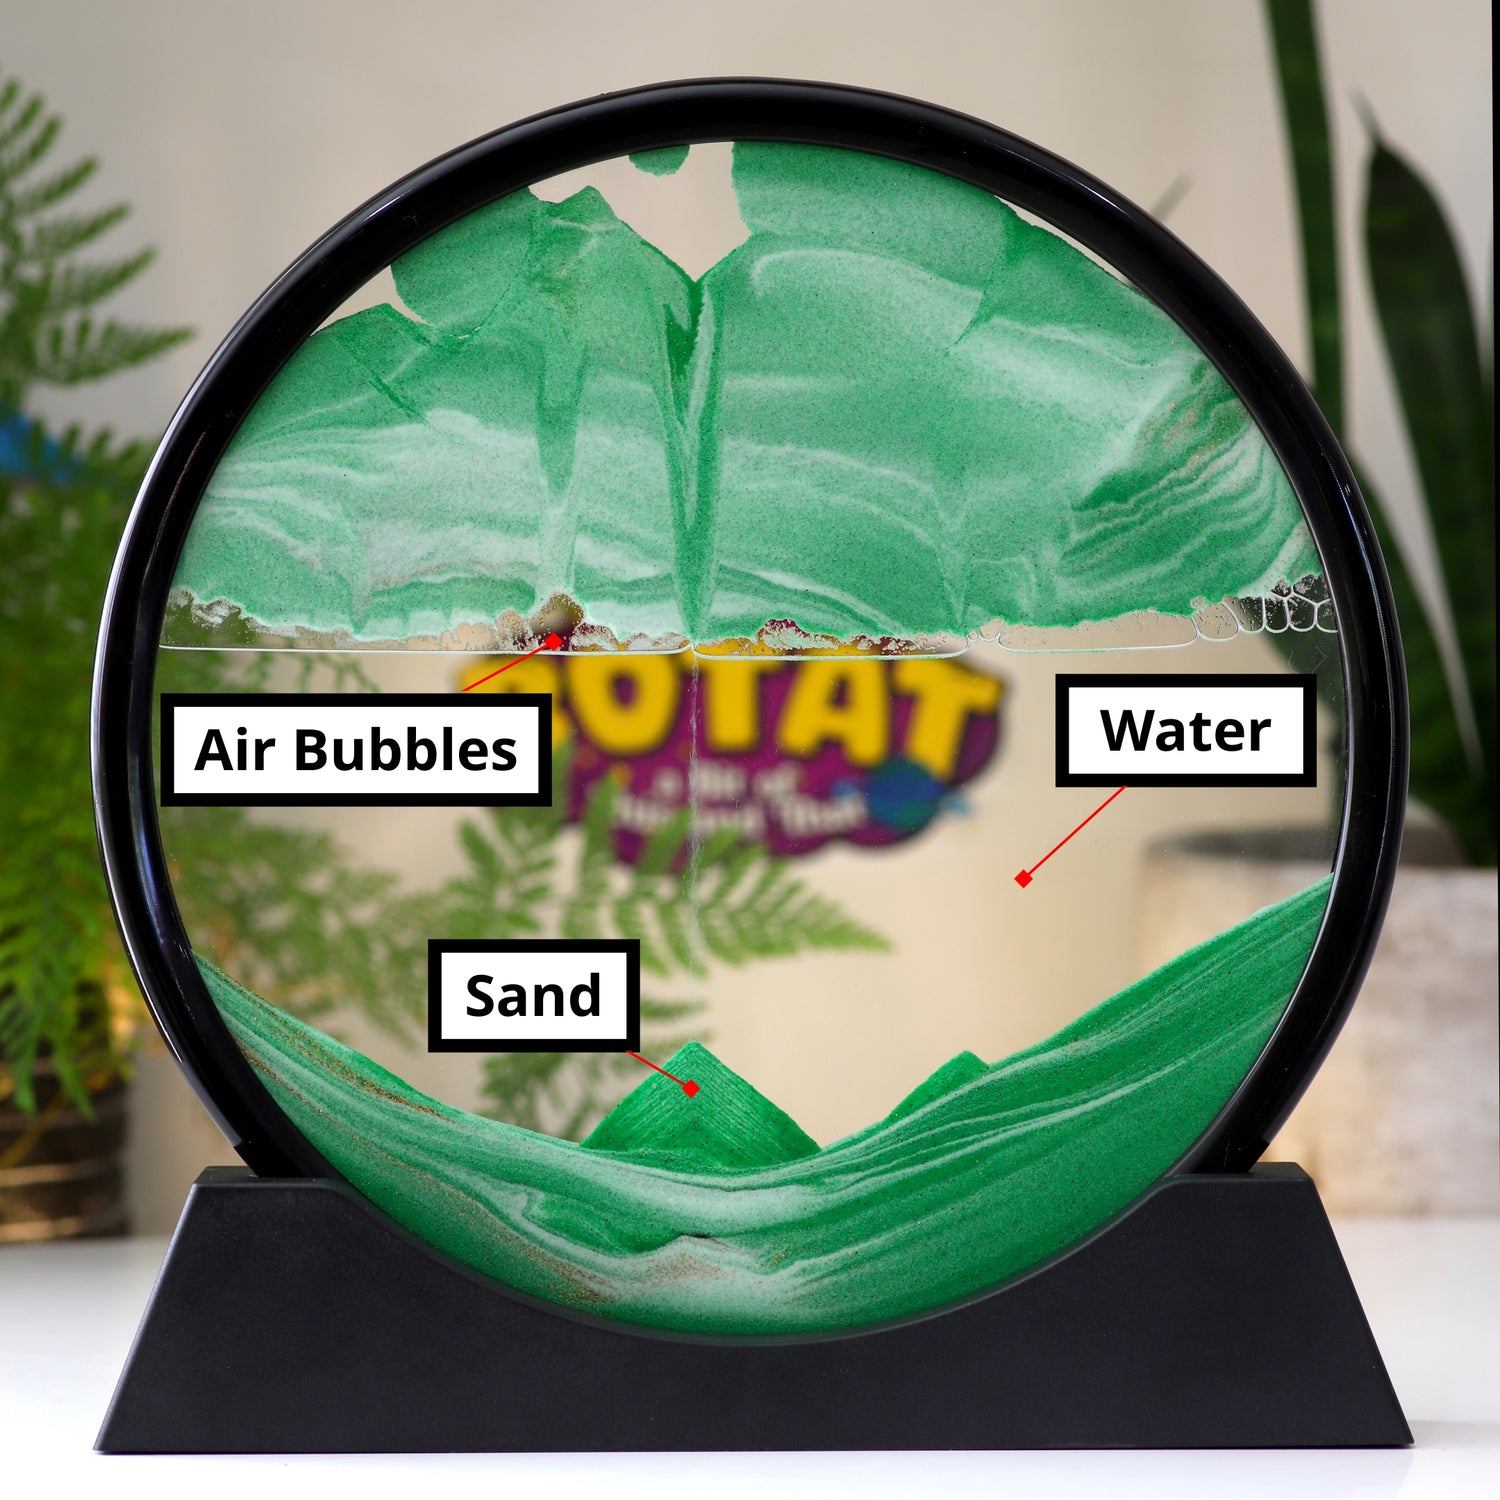
How does it work?
Our Sand Art is made up of simply three parts:
- Sand (Crushed quartz)
- Water
- Air
The air bubbles act as a barrier to slow the fall of the sand. As the sand lands, it layers over itself to create amazing mountainous designs.
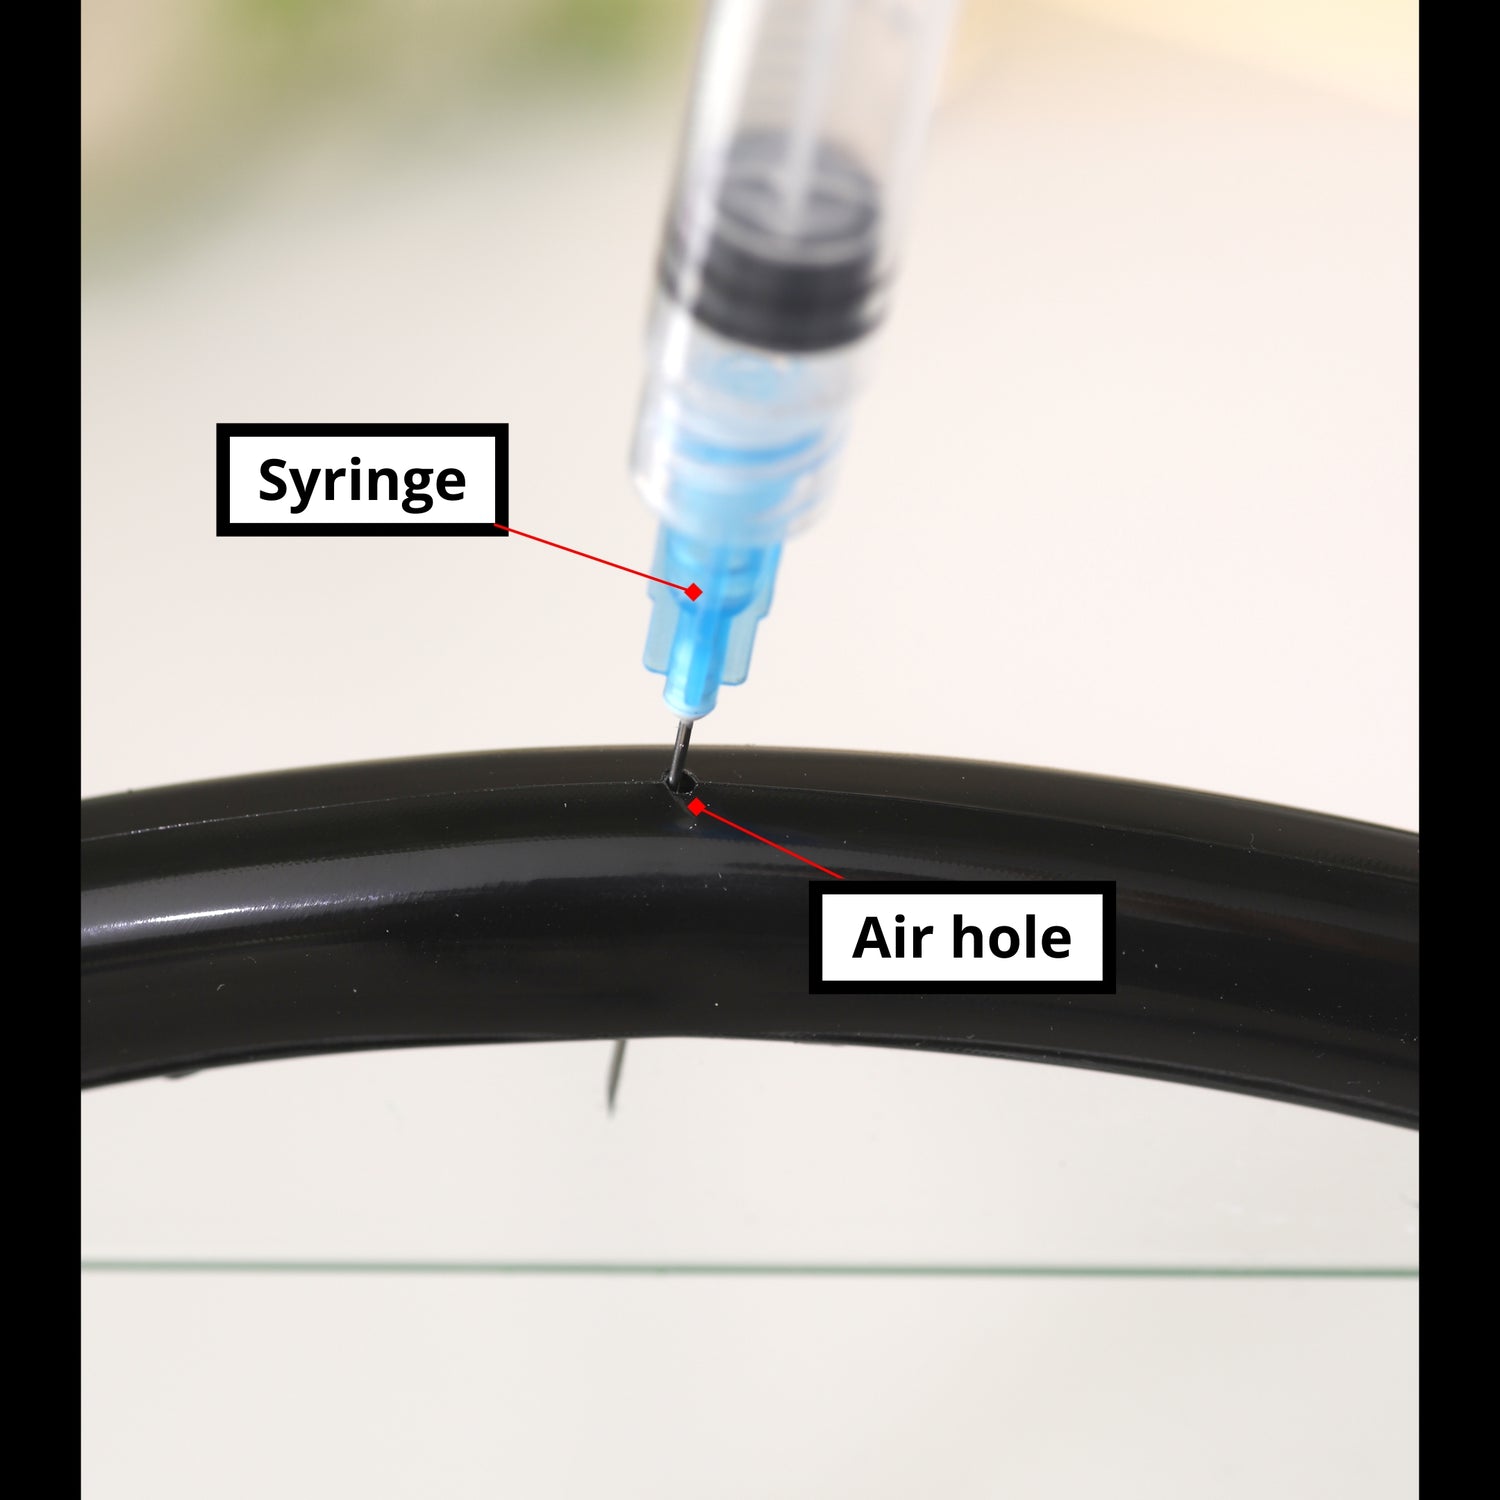
Adjusting Air
Sometimes you'll need to adjust the amount of air inside your Sand Art.
Syringes (found at your local pharmacy) can be placed through the Silicon Seal to do this.
- Locate the small hole in your Sand Art and rotate it until it is located on the top.
- Make sure all the Sand is at the bottom (away from the hole).
- Add or remove air (never add or remove water or sand).
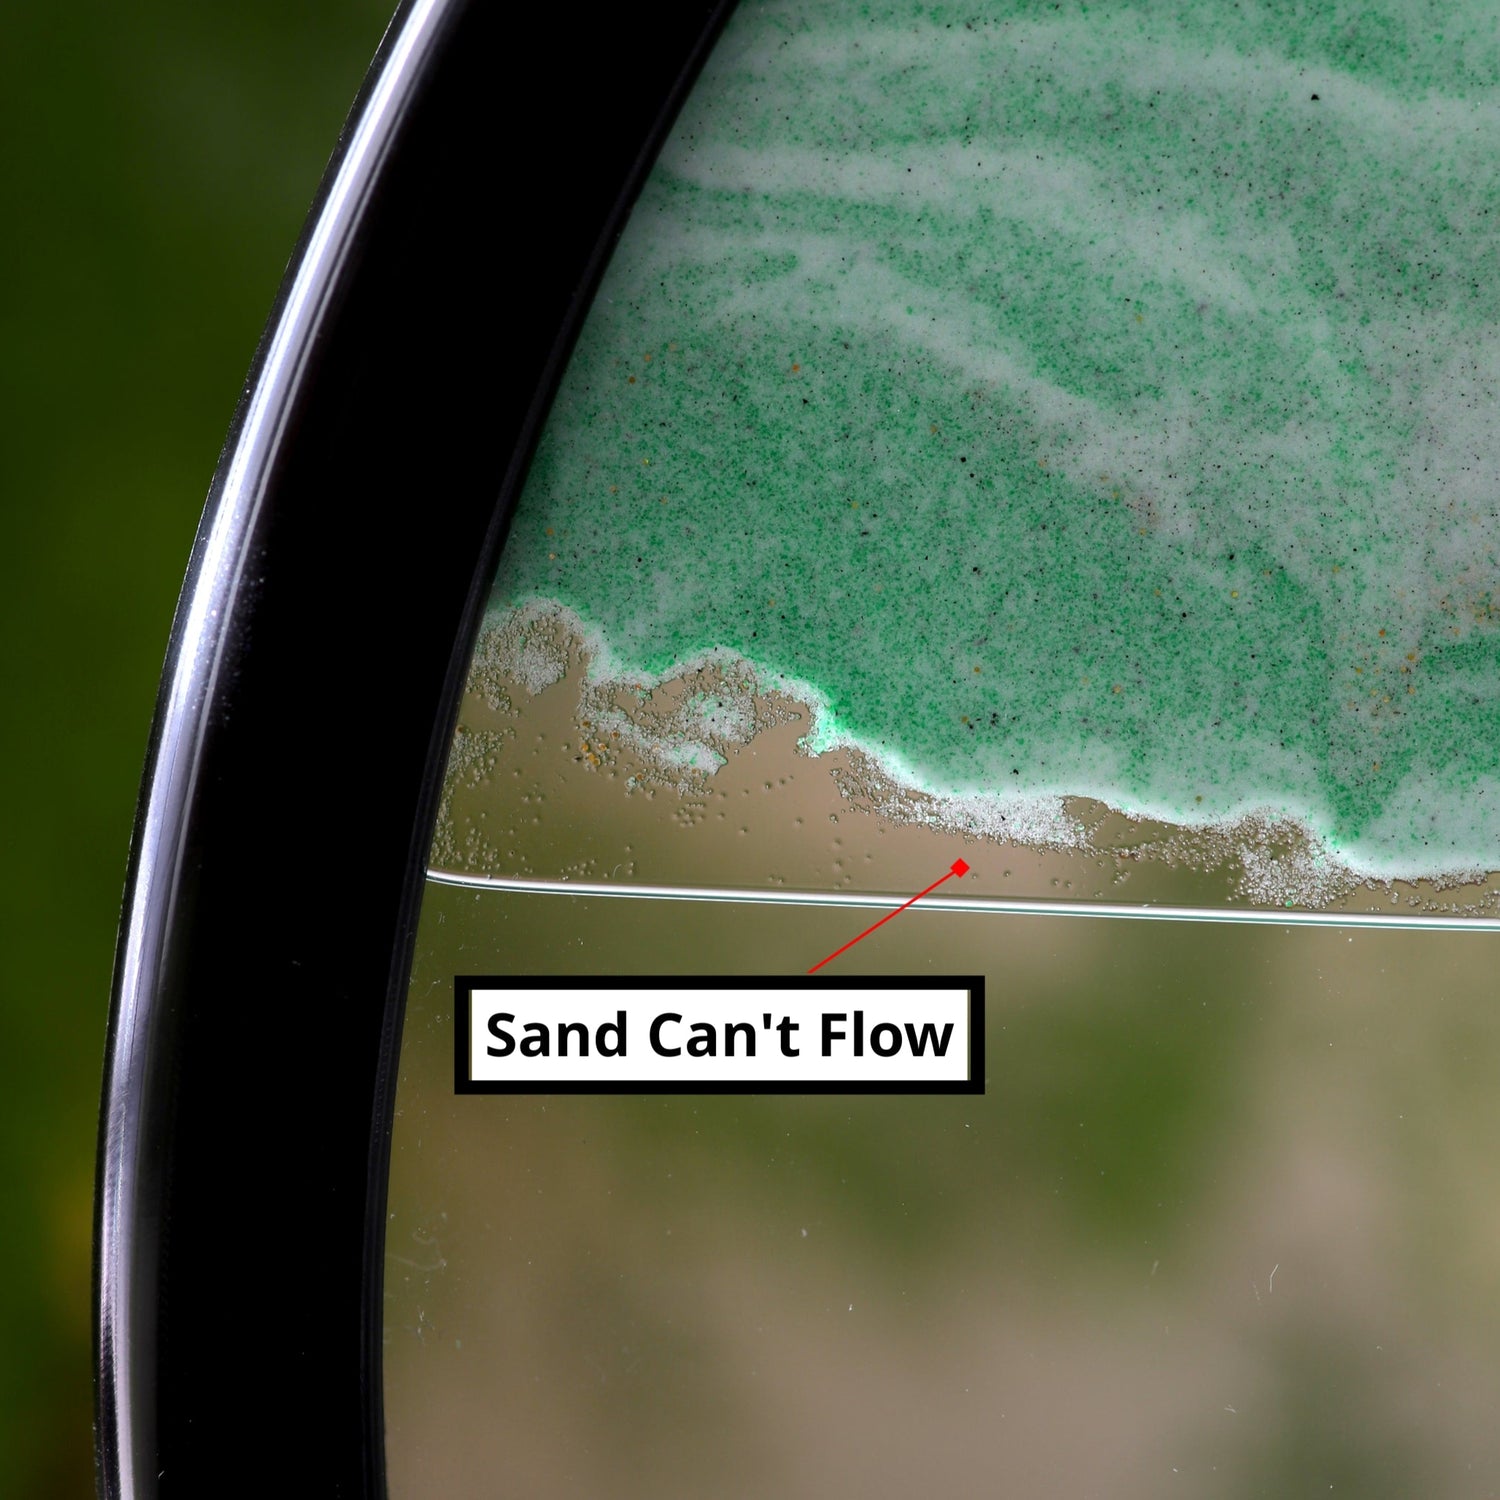
Too Much Air
Too many air bubbles means there's no room for the sand to fall through.
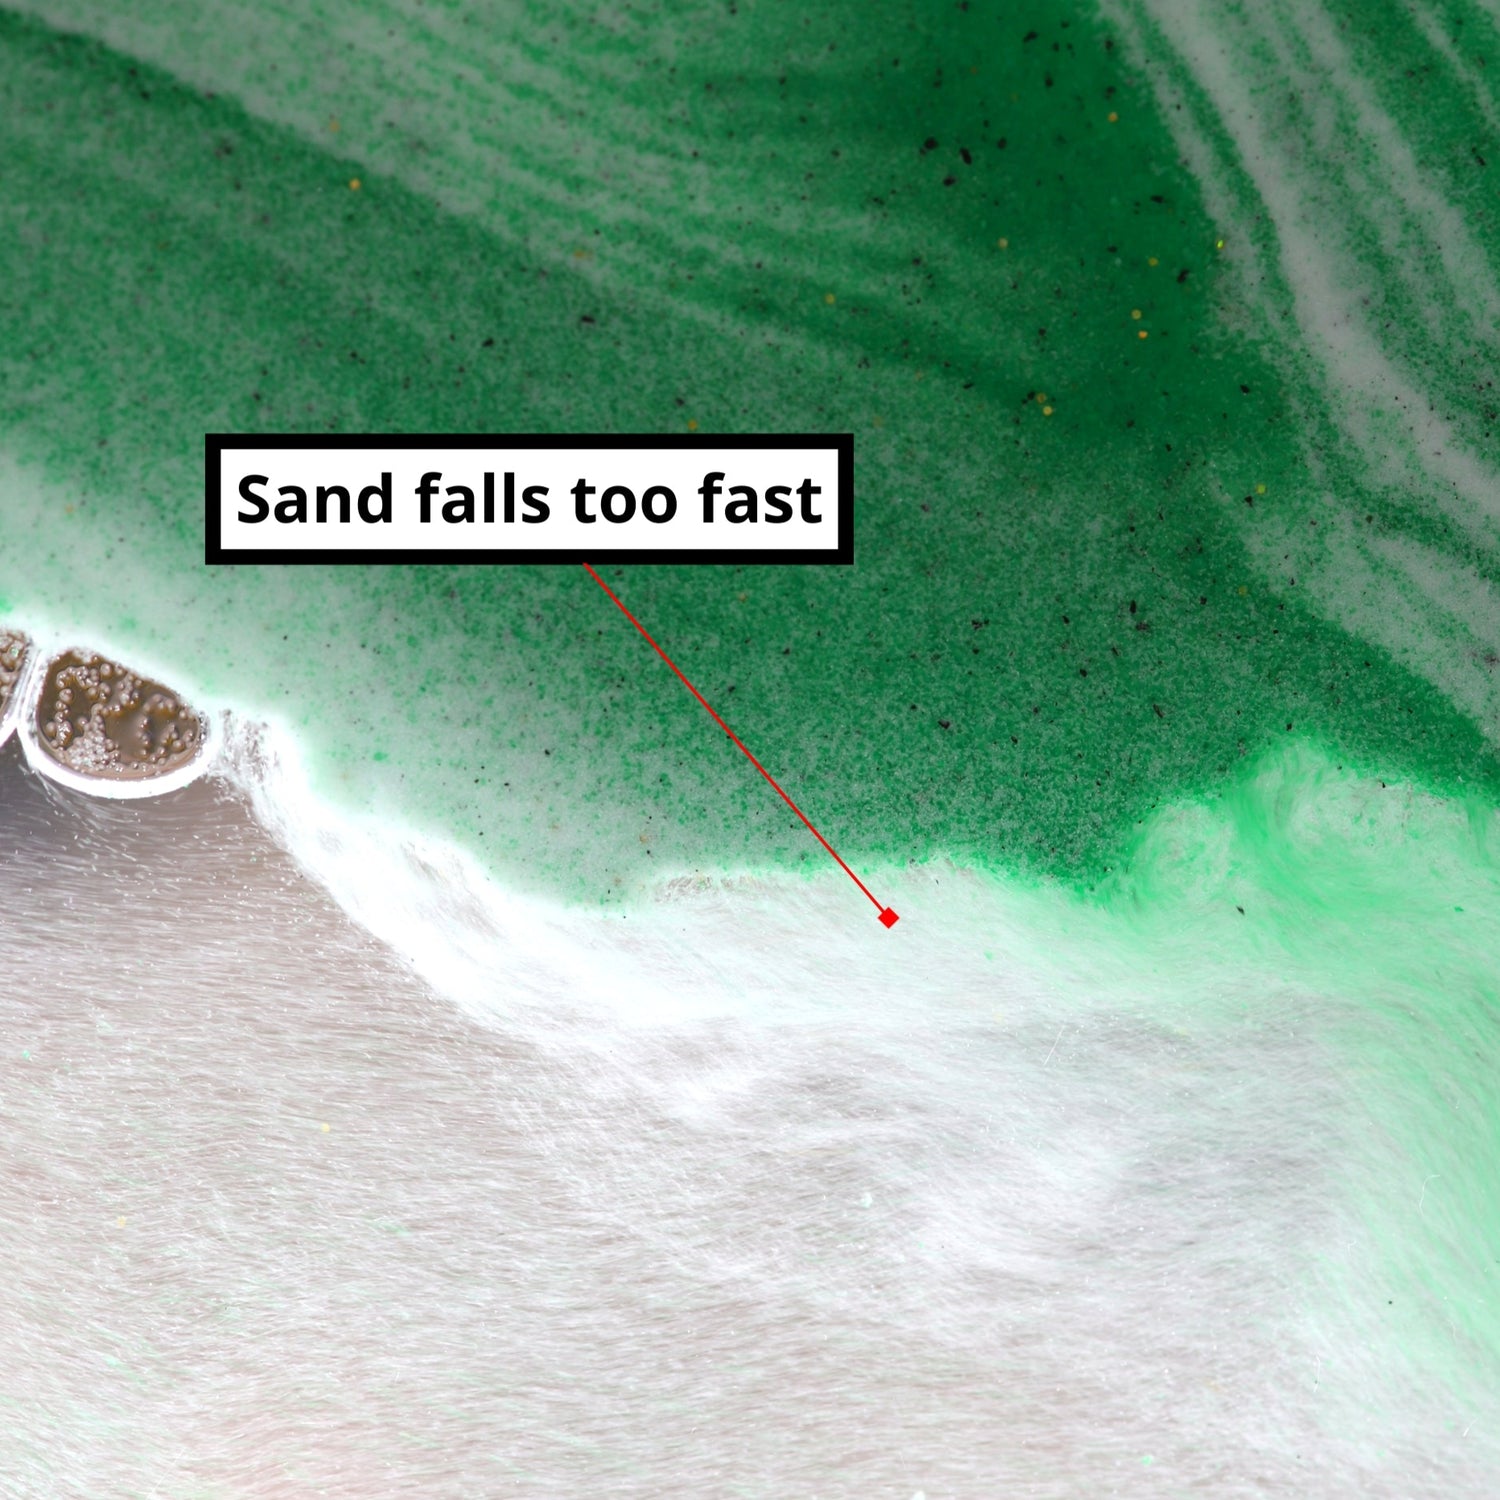
Not Enough
Not enough air means that the sand will fall at once. It is awesome to watch, but if you want it to slow down a little, add some more air.

Just Right
The sand falls slowly but consistently, creating beautifully intricate images.
Buy Yours Today!
-
MEDIUM - 7" Sand Art
Regular price $30.00 AUDRegular priceUnit price per -
BIG - 10" Sand Art
Regular price $45.00 AUDRegular priceUnit price per -
LIGHT-UP - 7" Sand Art
Regular price $50.00 AUDRegular priceUnit price per -
HUGE - 24" Wall-Mounted Sand Art
Regular price $295.00 AUDRegular priceUnit price per


